| View previous topic :: View next topic |
| Author |
Message |
markgeorgetwo
Lieutenant Commander

Joined: 21 Nov 2006
Posts: 372
Location: london england
|
 Posted: Mon Jun 29, 2009 9:27 pm Post subject: Type R heavy cruiser Posted: Mon Jun 29, 2009 9:27 pm Post subject: Type R heavy cruiser |
 |
|
Can any one help, i have noticed in my next fleet build up the sixth fleet that there is a few what is termed Type R CA .
And they have on there nacelles spikes what i want to know is how do i recreate this for the ships also is there a thread that shows them. |
|
| Back to top |
|
 |
djdood
Commodore
Joined: 01 Feb 2007
Posts: 3407
Location: Seattle, WA
|
| Posted: Mon Jun 29, 2009 10:01 pm Post subject: |
|
|
At the scale of the Starline minis, the "nacelle spikes" would be extremely hard to do and they would be very, very vulnerable to damage on the game table.
For my mini of the Republic, I chose not to have the spikes and went with the normal glowing-orange domes. I did add some "retro" saucer markings to back-date the look a little bit.

Everything I've read says the "R" type ships had been refitted to match the Constitution-class ships, so I would you could do pretty much anything and say it is "right".
If you choose to add spikes, the only suggestion I could make would be to drill-out the nose of the domes and add small brass pins. Even the smallest brass pin stock would be grossly overscale looking though.
_________________
  |
|
| Back to top |
|
|
markgeorgetwo
Lieutenant Commander
Joined: 21 Nov 2006
Posts: 372
Location: london england
|
| Posted: Mon Jun 29, 2009 10:07 pm Post subject: post subject |
|
|
So djdood if i follow your example i should not go wrong. so could you let me know by the markings where they should go so i think i will follow your advice  . . |
|
| Back to top |
|
|
Scoutdad
Commodore

Joined: 09 Oct 2006
Posts: 4751
Location: Middle Tennessee
|
| Posted: Mon Jun 29, 2009 10:13 pm Post subject: |
|
|
The "R" CAs were, IIRC very early versions of the YCA converted to Warp power. They were the 1371 - Republic, 1372 - Reshadije, and the 1373 - Ramilles.
As for modeling the needles on the nacelle, I'd say don't do it. At the scale of 1:3788, you'd never see them and anything you attached would be extremely fragile. Other than that, a standard CA miniature will suffice.
edit: Dang! Got interupted mid-post by a work related call and Will beat me to the draw!
_________________
Commander, Battlegroup Murfreesboro
Department Head, ACTASF |
|
| Back to top |
|
|
markgeorgetwo
Lieutenant Commander
Joined: 21 Nov 2006
Posts: 372
Location: london england
|
| Posted: Mon Jun 29, 2009 10:16 pm Post subject: post subject |
|
|
| Well thanks to both you lads. |
|
| Back to top |
|
|
Scoutdad
Commodore
Joined: 09 Oct 2006
Posts: 4751
Location: Middle Tennessee
|
| Posted: Mon Jun 29, 2009 10:18 pm Post subject: Re: post subject |
|
|
| markgeorgetwo wrote: | | So djdood if i follow your example i should not go wrong. so could you let me know by the markings where they should go so i think i will follow your advice . |
Follow this link.
It takes you to ADB's starship painting guides. The Federation CA is included in the list and the guide shows you everything from what colors to use, to where the markings should be added.
For a more detailed look, you can check out this link. It will take you to one of Starfighter_Ace's decal placement guides. While not a CA (it's actually a DW), the placement locations are very similar between the two vessels.
_________________
Commander, Battlegroup Murfreesboro
Department Head, ACTASF |
|
| Back to top |
|
|
Wolverin61
Commander
Joined: 16 Nov 2008
Posts: 495
Location: Mississippi
|
| Posted: Mon Jun 29, 2009 10:30 pm Post subject: |
|
|
I like this guide courtesy of DJDood.
_________________
"His pattern indicates two-dimensional thinking."
 |
|
| Back to top |
|
|
markgeorgetwo
Lieutenant Commander
Joined: 21 Nov 2006
Posts: 372
Location: london england
|
| Posted: Tue Jun 30, 2009 6:24 pm Post subject: post subject |
|
|
wolverin 1 said I like this guide courtesy of DJDood.
just looked at it that site it was very helpful lads.  |
|
| Back to top |
|
|
Rick Smith
Lieutenant Commander
Joined: 02 Sep 2008
Posts: 261
|
| Posted: Tue Jun 30, 2009 9:01 pm Post subject: |
|
|
Actually, markgeorgetwo, some very fine sewing pins would do the trick for your nacelle spikes.
Something like this: http://www.joann.com/joann/catalog.jsp?CATID=cat3432&PRODID=prd11086
You can do the following:
1. Use a pin vice (http://www.silverness.co.uk/USERIMAGES/PIN%20VICE.JPG) and a very fine drill bit - one that matches the diameter of the gauge sewing pins your using and drill a small guide hole down into the center of your nacelle. Make sure you measure the depth. Wrapping a thin piece of tape to your drill bit is great way to maintain a consistent depth of the hole drilled. Just make sure that the tape doesn't shift on you. You could also paint a small line onto the bit itself - less of a chance of it coming off.
2. Cut the sewing pin down to the same length of the hole you drilled into the nacelle. You'll want to keep the part with the with the point and discard the part with the rounded head. (These could be kept around for future modeling - as they could be used as rivets or even phaser bumps on a larger scale modeling project).
3. Put a small pool of superglue on a disposable surface and dab the end that will be pushed into the nacelle into the pool of glue. You really don't need a lot, just enough to anchor the cut end of the pin to the rear of the hole in the nacelle. To much glue and you'll have it drooling all over the place and making a mess.
4. Let everything dry and set. Once the glue is dry, use a file to clean up an rough glue areas that may set up around the nacelle cap.
With a small enough gauge pin, you should be able to recreate the effect you're going for. And with enough of the pin inside the nacelle, acting as an anchor, it's very doubtful that they'll ever pop off. Just remember not to pick up your models by the two ends of the nacelles anymore! 
Coupled with djdood's retro markings on the hull and you should have something pretty special looking.
Good luck. |
|
| Back to top |
|
|
SWO_Daddy
Lieutenant SG
Joined: 14 Feb 2008
Posts: 195
Location: Stuttgart, Germany
|
| Posted: Mon Jul 06, 2009 3:20 pm Post subject: |
|
|
I've used a similar technique for adding antennas to minis before. In those cases, I used very small diameter brass rod/wire. I've considered adding spikes to a Fed CA, but never gotten to it. But Rick's description above sounds like the best approach to me.
_________________
Check out my website at: http://www.jgray-sfb.com/
 |
|
| Back to top |
|
|
OGOPTIMUS
Captain
Joined: 10 Nov 2006
Posts: 979
|
| Posted: Mon Jul 06, 2009 8:30 pm Post subject: |
|
|
I've done this with several of my minis. They are a bit thick as compared to the pictures you could find out there of the "Big E" from The Cage and Where No Man Has Gone Before, but they work.
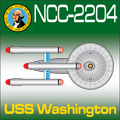
My post about the Fed 6th Fleet even includes the Reshadije and the Republic which have pins in the nacelles for spikes.
http://starfleetgames.com/federation/phpbb2/viewtopic.php?t=1224
Rick's method is exactly what I've done, just a pin vice and some sewing pins cut down. It will work with both plastic Zocchi nacelles and the metal ADB ones.
I'd only suggest that you might need a drill bit slightly larger than the diameter of the pins that you use, it will make putting the pin with glue on it into the nacelle A LOT easier. And I will also stress that you shouldn't use too much glue. If you're really worried, remember that the paint you apply to it will also help fill any small gaps.
_________________
O.G. OPTIMUS

Newest Page | Newer Page | OLD Page |
|
| Back to top |
|
|
markgeorgetwo
Lieutenant Commander
Joined: 21 Nov 2006
Posts: 372
Location: london england
|
| Posted: Tue Jul 07, 2009 7:32 pm Post subject: post subject |
|
|
| Dear OGOPTIMUS its your guide lines iam following for the sixth fleet . |
|
| Back to top |
|
|
|

