
And then there are times we see how Juggernauts are *really* made. (In the background)wedge_hammersteel wrote:I always wondered why we dont see all of your fingers in any of your pics.
Will McCammon's Minis (Formerly: My wallet hates me, but...)
Moderators: Albiegamer, mjwest

If that image shocked you... then obviously you aren't from the south. Down on the farm, that's a natural way of life for all the critters (even juggies...)Krellex wrote:Oh, yes, that is correct. I was so shocked by the image, I mixed up who the workbench belonged to.
Commander, Battlegroup Murfreesboro
Department Head, ACTASF
Department Head, ACTASF
It's been a little while since I posted some pictures.
Watching Paul's excellent Romulan FastHawk build, I noticed that I missed adding the lower engine-mounted phasers to mine (the phasers that replace the plasma-F launchers of the normal FireHawk). I went back and added them, using brass pins.

I also completed my upgrade to my Romulan RoyalHawk command cruiser. The stock double-engine-and-box part just didn't say "big, scary, plasma-R launcher" to me, so I scratchbuilt one, using metal tube stock and greenstuff (and the stock FireHawk engines).

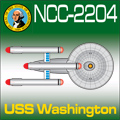
I'm also finally pretty much finished with my Federation CVA reconstruction. I just need to add some phaser bumps and it should be ready for prime and paint (the picture is from before I finished sanding the engine joints).
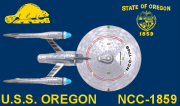
I'll need to work up custom decals for this one, as it's pretty unique at this point. I'll almost certainly mark it as the Washington (in honor of where I live).

Lastly, I started fabrication on a potential (maybe, someday) kitbash "sculpt" for a Klingon HF5 heavy war destroyer. This one will get built very similarly to the F-5W I did, but it's going much quicker. I have all the "lessons-learned" from that build, plus some spiffy new tools (like my mini chop-saw, etc.). I did in minutes what took hours on the F-5W.

Watching Paul's excellent Romulan FastHawk build, I noticed that I missed adding the lower engine-mounted phasers to mine (the phasers that replace the plasma-F launchers of the normal FireHawk). I went back and added them, using brass pins.
I also completed my upgrade to my Romulan RoyalHawk command cruiser. The stock double-engine-and-box part just didn't say "big, scary, plasma-R launcher" to me, so I scratchbuilt one, using metal tube stock and greenstuff (and the stock FireHawk engines).
I'm also finally pretty much finished with my Federation CVA reconstruction. I just need to add some phaser bumps and it should be ready for prime and paint (the picture is from before I finished sanding the engine joints).
I'll need to work up custom decals for this one, as it's pretty unique at this point. I'll almost certainly mark it as the Washington (in honor of where I live).
Lastly, I started fabrication on a potential (maybe, someday) kitbash "sculpt" for a Klingon HF5 heavy war destroyer. This one will get built very similarly to the F-5W I did, but it's going much quicker. I have all the "lessons-learned" from that build, plus some spiffy new tools (like my mini chop-saw, etc.). I did in minutes what took hours on the F-5W.
Last edited by djdood on Sun Oct 02, 2011 12:34 am, edited 1 time in total.


-
Wolverin61
- Commander
- Posts: 495
- Joined: Sun Nov 16, 2008 2:07 am
- Location: Mississippi
- Contact:

New batch of minis arrived today from ADB.
Got my copies of the oCA and it turned out better than I'd hoped. The spliced main-hull held up really well in the mold. The blended fillets on the engines could have cast better (the thinnest parts of the blends tend to melt away) but I don't think they detract too much.
One benefit of epoxy tending to melt away is that one major error I made disappeared. I goofed and spent a lot of time sculpting sponsons on the front corners to double-up the forward phasers. Those weren't needed (the oCA has the same single-mounts as the oCL) - I misread some of the art. In the end, they melted off, so no problemo.
I am glad the vestigial lower hull/sensor-dish enclosure turned out well. The lower 360-degree phaser mounts even made it through casting.
In the same batch, I also finished my fighters collection (Kzintis and Romulans) and added two packs each of drones and plasma torpedoes.
For ships, I got one each of Tony Thomas' great sculpts of the Hydran Pegasus and Gendarme and a few small ships (FF, DW, and CW) to flesh out my tiny Hydran fleet (one fleet box and some token SL2200 oldies acquired in eBay lots).
I also picked up an additional Kzinti DW (which will be kitbashed into a HDW), another D-5 and Klingon pod to kitbash an LTT out of (using Jessica Orsini's Captains Log article from years ago as my guide) and a T-7 tug add to my Romulans (they need a "target" painted in their colors).
I managed to forget to order the Klingon B-9 and another Fed Pol (I want to kitbash a PFF, after reading the story in CapLog41).
Painting will come (much) later. I still have a ton of assembly and sculpting work to finish. Unlike previous years, the onset of fall and the 8-month "wet season" here in Seattle isn't a death-sentence on painting, like it was before. I acquired a small forced-air hobby paint booth back in July, so I'll be able to paint inside, when the time comes.
Last edited by djdood on Thu Sep 23, 2010 12:15 am, edited 1 time in total.

After so much time away, I didn't want to dive straight back into anything too involved. I decided to tackle one of the easiest kitbashes known, a Klingon D-5H Light tactical Transport.

Jessica Orsini had an excellent article about this one in Captains Log, years ago. It's literally as easy as getting a D-5 and a spare tug pod, drilling a small hole in the bottom of the D-5 (for the tug pod's second peg), drilling a new stand hole in the pod, and gluing the pod and the ship together.
Truth be told, I did a bit more, by filing the D-5's lower surface flat and cross-hatching the two mating surfaces, but that's about it. It took far longer to clean up, putty, and sand the mini than it did to kitbash it.
Thank Paul.
That's Mr. Surfacer primer you're noticing.
It's a really thick brush-on liquid primer. I use it as a top-coat over Squadron or Testors white putty. The Mr. Surfacer is very fine grained and helps blend out the transitions better, as well as fill any imperfections. It works great for "orange peel" surface issues, etc.
I goop it on relatively thickly with a Q-tip (like you can see on the oCA minis in the workbench pic). The majority gets sanded off (like in the D-5H pic).
I don't use greenstuff for finishing work, unless there is a major problem. I normally use white putties since they're premixed and just quicker and easier to use.
Their drawback is that they are just talcum powder and some binder, so they're pretty fragile when cured. They're not good for huge gaps or for filling missing chunks in a mini and they're useless for building up missing edges, etc. Anything that's likely to take abuse on the gaming table, handling, etc., will just get chipped off.
In cases like that, I invest the time to knead up some greenstuff.
In either case, I go over the coarse-sanded putty with Mr. Surfacer, then sand again (with fine grit).
Last edited by djdood on Mon Jun 11, 2012 10:32 pm, edited 1 time in total.