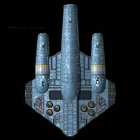
Tenneshington Decals is now 100% up and running, with the completion of our decal sets to work with Amarillo Design Bureau and Mongoose Publishing's Starline 2500 Federation Fleet Box set of miniatures.
We also have small sheets to work with the individually "blister packed" miniatures that are available.
As with the Squadron Box decals that have been available for a while now, all names on our products are custom-choices.
I've updated our website regarding this and will be further updating it with suggested-names lists, etc. in the coming weeks.
Thank you.
Announcing: Starline 2500 decals!!!!!!!!!!
Moderators: Albiegamer, mjwest
The website for Tenneshington Decals received a major facelift last night.
I still need to go fix a few copy-paste errors and add some missing content on pages folks aren't likely to click into, but the site is much better than it used to be. I wouldn't call it a slick marketing thing, but it's better than the really spartan and basic "I coded this in Notepad, because it's all I had" version previously representing us.
We now have separate pages for our product types, better descriptions of them (with pictures! OMG! So 21st Century!), and lists of suggested names for expedited processing/shipping.
For the time being, we will continue to use the Adobe pdf order form in an email as the vehicle to place orders. Eventually, I will swing back and update the website again to automate the submittal process, but not anytime real soon.
If you enjoy flip-floppy "mouse-over" buttons, etc., come take a look.
http://www.tenneshington.com/


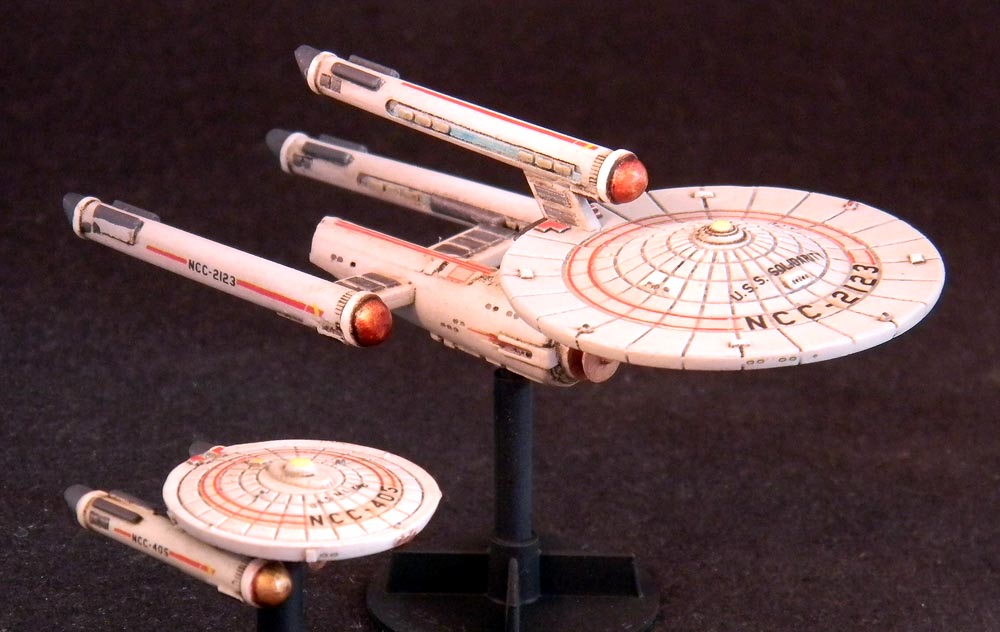
Nope. I did post pics of some of the prototype decals here:djdood wrote:Fantastic work, Jim.
I'm not positive, but I think that might be the first picture of our products applied that I've seen anybody post. (Excluding our own, done by Tony).
Very cool to see. Nice job with them!!
http://www.starfleetgames.com/federatio ... php?t=4461

Jim -
I should have been more specific
First set of production decals. There were a lot of changes made to them between those prototypes and the production versions (not least of which was having real minis to take calipers to and verify things like the diameter of the saucer-rings, etc.).
Regardless, very nice work. Thanks for posting the pic (and for being our customer).
Bill -
Sorry you had trouble with yours. Maybe Jim can elaborate on any special techniques he used?
For my own use, I leave a "spoke" or two of decal paper to support the ends of the numbers/name/ring decal. I score the decal film (cutting the film, but not all the way through the paper) where the "spokes" are.
This gives those ends some stability during soaking and lay-down, as they have the paper tying the two ends together, side-to-side. Since the film was cut, it still slides off just as if the "spokes" weren't there, but the paper spokes keep the thing from drifting so much.
It also makes a handy place to grab the paper with tweezers to pull it out from under the decal during lay-down.
-
Jim Lewis
- Lieutenant SG
- Posts: 121
- Joined: Fri Mar 25, 2011 8:41 pm
- Location: Campbell, CA USA
- Contact:
Thanks Will!
Bill - I used the DNG as my first attempt, and wound up breaking the Combat Leader Rings in several places. I think this was my fault, and not Tenneshington Decals' error. I used Micro Sol as a wetting agent before I placed the decal on the mini. When I did - it stuck fast - to the Future Floor Finish on the surface of the mini! I wetted the area again with tap water to dilute the Micro Sol and was able to nurse the pieces back into a somewhat reasonable alignment. I used multiple coats of Future to fill the deep engravings underneath the decals on the saucer to prevent sagging and silvering, and don't think it caused a problem with decaling - never has before. I think just using plain water was the trick for me...
When I got to FFG M.L. King (you guys at Tenneshington are brilliant) I just used straight water over the Future Finish and the Combat Rings slipped into place without problem - I even messed around with them a bit - keeping the area wet while doing so.
Needless to say, I'm stoked with my set of Tennenshington Decals. My other modeling life has intruded into my gaming mini time, else I'd have the rest of my squadron done already. I'm detail painting my CA now in preparation for decaling, and think I'll have to get another secondary hull for my BCH - it's too badly mold-slipped to recover and I wouldn't want to waste my decals on it...
-
bluebirds38

- Lieutenant Commander
- Posts: 235
- Joined: Thu Oct 29, 2009 3:15 am
- Contact:
-
Sneaky Scot

- Commander
- Posts: 484
- Joined: Thu Jan 11, 2007 11:28 am
- Location: Tintern, Monmouthshire